Well, not quite yet but there is a need to get a fireplace into the back rooms of our home as the area was originally a sunroom and it is subject to the vagaries of weather.
We took care of the summer cooling issues by installing the largest, meanest swamp cooler possible (we live in an icebox in the summer now). Heating has become the priority this month and our solution was to install a gas stove. Problem is, I hate how they look.
I’m a fireplace kind of gal. I like fire, flame, crackling sounds, … you get the picture.
So a compromise is in order. Gas is the preferred method of heating due to cost effectiveness and the fact that there is a gas line right on the outside of the fireplace wall and with a little bit of wheedling, I can still have my fireplace atmosphere. Thank heavens, I have a patient husband.
We found the perfect gas “fireplace” insert (complete with logs and brick interior). Next we built the fireplace mantel and surround.
We started with a sheet of one sided walnut plywood and 6 1×4 strips of pine. A little wood glue and some nail gun nails and voila, we have a fireplace.
I know, I know. I can hear you all screeching “Is that it? no directions?” Seriously?! Would I leave you hanging like that?
Here it comes.
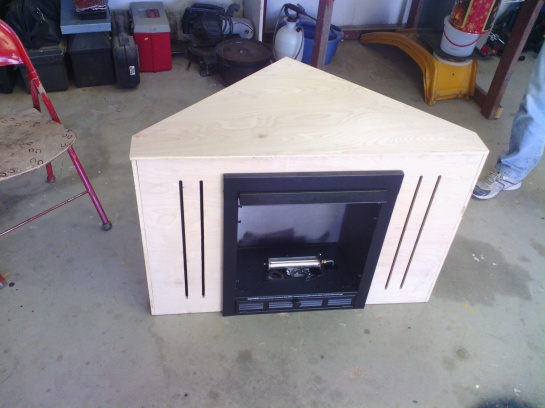
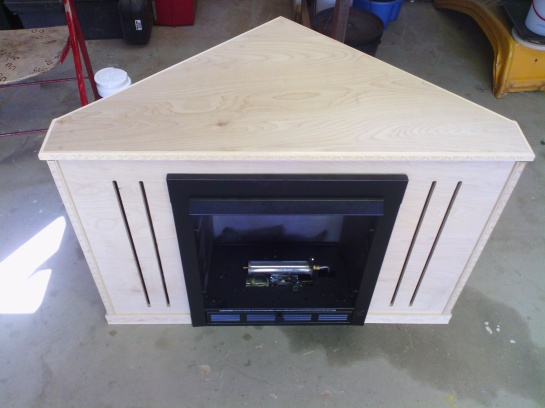
The first step was to measure the front of the “fireplace and determine how much of a face we wanted. I needed enough spacing on the sides for venting and on the top to hold the mantel. Then the sheet was marked for venting, the insert aperture was marked and the width and height decided upon. Once the sheet was ready to sit on top of the insert, we double checked our cuts and measurements in preparation for the ventilation cuts.
While this is a ventless gas fireplace, I needed a means to keep the insert casing cooled since we were enclosing the system. the “radio” vents on each side of the fireplace inset should allow air to be drawn in to cool the sides of the actual fireplace.
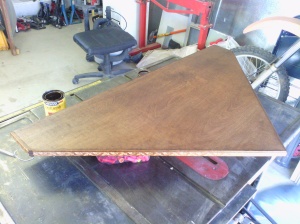
Once the face is cut, the mantel top is measured and cut. This particular fireplace is going to sit in a corner of our gameroom so the mantel piece is triangular. This is not the finished cut. It will need to be remeasured once the entire fireplace is assembled.
Once the mantel is cut, it is set aside and construction on the “back” of the fireplace surround begins.
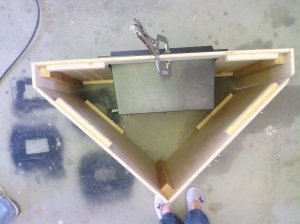
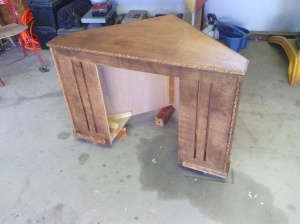
This is actually the easy part. I have a base and all I need is two triangle sides. Once these are cut and fitted with the face; meaning lining them up so they fit the corner of the room (good thing it’s squared) and are centered with the face; the next step is to create bracing so the unit is sturdy and won’t change shape if it gets moved.
This is where those 1x4s come in handy. First they are cut and glued in place. Then we shoot them with the nail gun so they never shift.
We gave them 30 minutes to cure before shooting in the nails. We also placed a bracer piece in the back corner to hold both sides in place and cut edge pieces for the fireplace front as this will not be a true triangular construct. This is a last minute change in my design so already, my mantel piece will need to be modified.
Bracing had to be placed at all stress corners and on the top and bottom. I don’t want this thing to crumble so we are building it to withstand even an earthquake.
Next, comes the cross bracing. The top is simple enough but the bottom is tricky since the insert will cut across the optimal path of the brace.
After the cross bracing is in place, the back pieces and the front piece are anchored together. Every piece we install is glued and nailed to ensure that it cannot shift out of place.
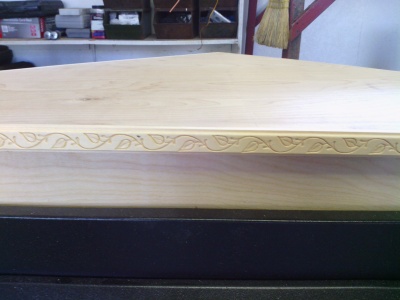
We leave the “case” to cure while we remeasure and cut the mantel piece. It will sit on top of the case and will sport a small lip. I didn’t want an overhang on this design. In order to ensure that it doesn’t shift, we will place blocks on the underside that will sit in the open spaces inside the case. I had some decorative wood edging left over from my daughter’s hope chest project so we are using that to trim out the rough edges of the wood.
While the mantel is curing, we go back to work on the case. The insert will not fit with the cross bracing in place at the bottom of the case. It is decided that we cut through the bracing and anchor the bottom of the brace to the anchors holding the backs and front together. I have to cross my fingers that it will be sturdy enough. To my surprise, it doesn’t shift at all once we’ve completed the cuts. Hard to see the detail, but if you look closely, you can see the bottom anchors on the left side of the photo.
Now we can put the insert in and get an idea of how it will look.
But first, we need to make sure that the case still fits the corner of the game room we want it to be in.
Perfect. This also let’s me know where to mark off the entrance of the outside gas line on both the case and the interior wall of the room.
As soon as we are satisfied with where the piping will be, we take the case back to the garage to determine where to place the decorative trimming.
The rough edges just won’t do. I can already see, in my mind’s eye, how this will look once it’s finished and “roaring” in the corner of our game room.
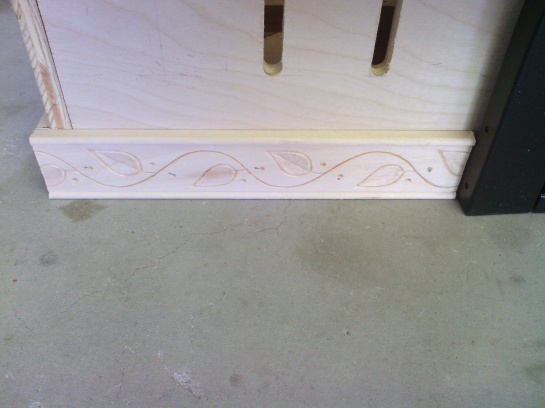
Trim comes next. I didn’t want a raised base since the fireplace is going under two windows and a base would have made the unit too tall. I have some large decorative trim that will give the fireplace the illusion of possessing a base.
There is just enough of it to cover the exposed bottom of the fireplace. For the sides and mantel edges, I am using a smaller leaf patterned wood trim.
By this point, I am chomping at the bit. This has taken all morning and most of our afternoon to build and now I have to wait for the trim to cure before I can stain and vanish the piece and move it into the house. It’s 3:30 p.m. and I have until 5:00 p.m. to get it done. Luckily, the mantel is cured and ready to go.
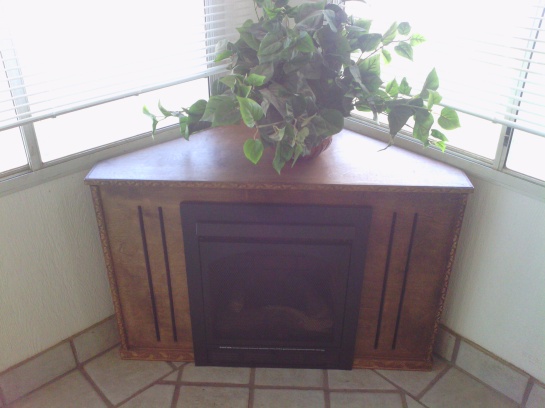
I have chosen a medium red maple stain and honestly, while in the garage, I worried that it might be too dark. Well, too late now.
Getting the stain into every crevice of the molding is quite a trick. An old sweatshirt, turned inside out, does wonders to reach those hard-to-get-to spots.
Once the mantel is completed, the fireplace case is ready for the stain and, happily, I only have to stain the exposed front and edges.
A quick coat of varnish, and a polish sanding, and at 4:42 p.m., we move the fireplace into it’s permanent home.
Not bad for a bad days work. Only problem now….It’s not yet cold enough to need to turn the fireplace on. Oh well, it will be ready for the holidays and I’ll have toasty warm rooms and crackling fireplaces in my home soon enough.


